Photographing
The
Norton Road R.R. Layout
By John Humphries
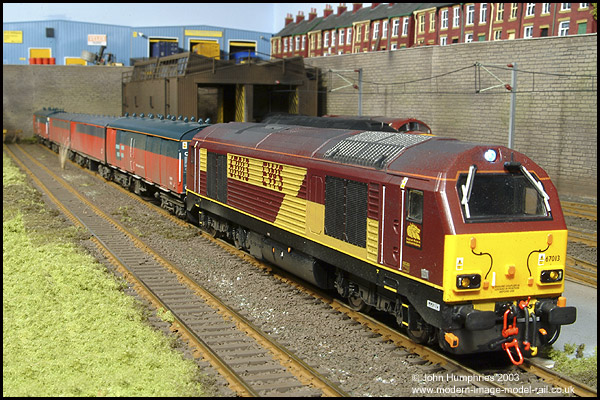
The Norton Road is based on a fictitious depot based in the North West.
The main layout measures 8 feet long by 2 feet wide and is constructed from 4mm plywood on a 3" by 2" structual frame. All joints are glued and screwed for ridgidity. The baseboard is completely screwed to the garage wall. The main layout runs into a large fiddle yard which also forms my model rail workshop.I live out in the country in North Wales, UK. I have always been interested in photography from a young age when I worked in a Black and White Photo Lab.Railways have always been a keen interest for me and I would often be found at the side of a railway line, camera in hand.

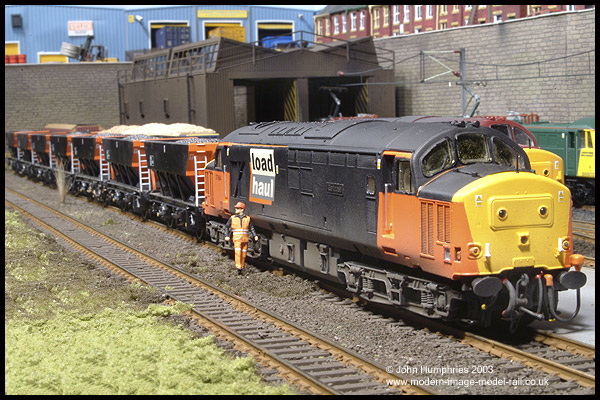
I started Model Railway Photography 3 years ago when a friend of mine asked if I could take some photos of his newly built exhibition layout for a planned website. I had never done this type of photography before so knew little about how to go about it. Early photos were done just using the garage fluorescent light and my Fuji S 1 mounted on a tripod. Results were good and one of the leading Railway magazines asked if I could do some photos of the layout for an article in their model rail section. I only had 3 days to get the photos done and working full time caused some problems. The photos appeared on a 4 page spread in the magazine the following month, the owner of the layout was very pleased and has the magazine pride of place in his hallway.
Things have progressed very rapidly from then on taking regular photos for my friends and my own model rail layout. I have had several photos printed in different railway magazines and have recently had another full article accepted for publication. Gone are the days of using fluorescent lights. I now use either Bowens studio lights or Halogen lamps. I now use the Fuji S2, which is ideal for model rail work.

The Fuji S 2 Pro Digital camera is used with either a Nikon 28 - 80 mm or 24 - 120mm lens, usually shooting at 100 - 200 ISO at a minimum aperture of f 22 depending on focal length. Any macro work is done using a Tamron 90mm lens.

When using the studio lights I use two Bowens Esprite 500 Watt lamps, one as a main lamp fitted with softbox and the other as a fill light. I fit a white umbrella onto the fill light. I also have a 3rd 250 watt lamp, which I use as required. I have one large white/silver reflector to help remove any remaining shadows. Flash is fired using an infra red flash trigger, this keeps wires to a minimum.
I have had some really good results using halogen lamps that I bought from a builders merchant store. these are the type used for construction site lighting.
I have 2 sets each and each set consists of two 500 watt halogen lamps mounted on a stand. I also have two separate 500 watt freestanding units that gives me total power of 3 kilowatts of lighting. Great care must be taken using these lamps as the heat from them can easily melt a model if they are placed too close. Wghite balance is taken care of on camera set at tungsten.
When photographing a model for a commercial client such as the tank car, there are obstacles to overcome. This model was taken using 3 Bowens Esprite studio lights 2 X 500 watts and 1 X 125 watts. To get rid of annoying shadows I adopt the following technique.
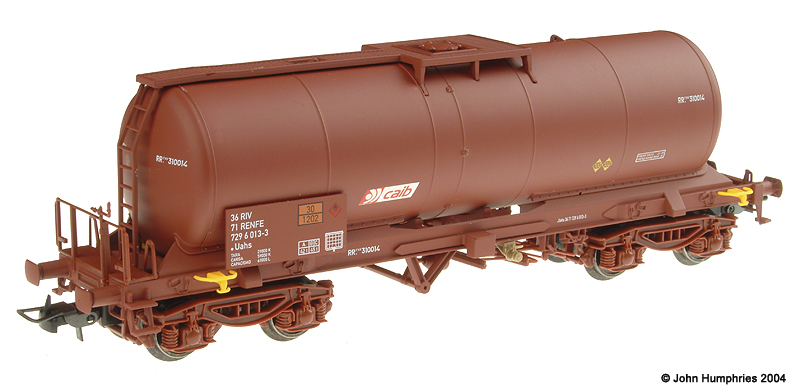
I photograph the product on a sheet of white plexiglass, which allows me to light the tank car in this case from below and provide a nice white background. The first light is used to light the background with the second lighting the model itself from the front and slightly to the left. The final light lights the model from the underneath and gets rid of any shadows. Sometimes I switch this light off to produce a shadow at the base of the product. Depending on the product I sometimes hang a fine net curtain above the product and fire the light through the net. This diffuses the light and gives a pleasing soft light. Finally the images are post processed using Adobe Photoshop CS.
Finally, all my images go through Adobe Photoshop and optimised for web viewing or output at 300 DPI for magazine work.

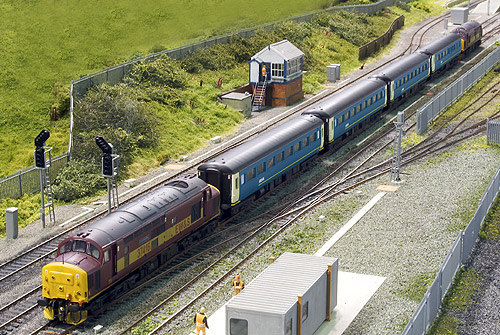
I first started model rail photography when Nick
Gurney first asked me to take photos forhis Dyserth Road website.
The original photos were taken in Nick's garage where his layout was kept,
lighting was provided by fluorescent lamps and the images were taken using
a Fuji S1 Pro camera set on a tripod and using timed exposures. Due to
the fluorescent lighting in the garage the early pictures suffered a slight
orange/yellow tinge which Nick liked as he thought it added some atmosphere
to the images. As Nicks website grew in popularity we were contacted by
Phil Sutton editor of the popular Rail Express magazine to provide an
article written by Nick and photographed by myself. Having never taken
any photographs for a magazine before and a deadline to meet lots of photos
were taken again still using the existing lighting in the garage we managed
to produce enough shots for an excellent article for the February 2002
issue of Rail Express. Nick was so pleased with the article the original
proofs were framed and placed pride of place in his hallway.
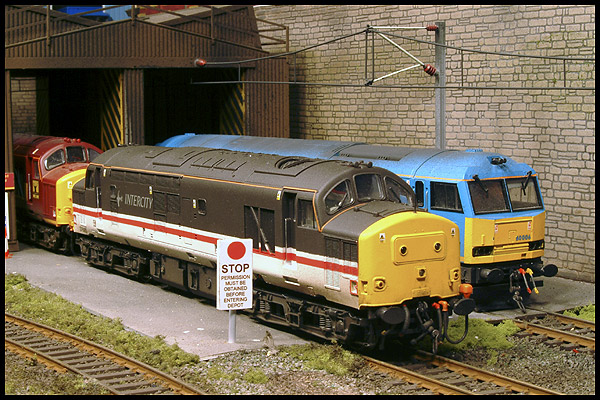
Following the article I decided better lighting was required and as I already had some studio lighting which I use for portraits I decide to give them a go on Nick's layout. This proved to be a great success allowing much greater control of aperture and a much improved depth of field.
I now use the lights as standard in the following way.................
Main light Bowens Esprite 500 with softbox, Fill light Bowens Esprite 500 with white brolly acting as a softbox. I shoot all pictures with the aperture closed right down usually at f27 and shutter set at 1/125 this gives the best depth of field possible keeping as much of the model in focus as possible. With the studio lights I am not restricted to using a tripod so can now get some different angles on the layout which must now have had well over 1000 shots taken in the last few years. I now use a Fuji S2 camera and shoot using tethered mode direct into my Sony laptop, this allows instant viewing of the taken image on screen and any adjustments can easily be made, you would be surprised how many times we have spotted a loco not on the track properly or a mysterious piece of polystyrene from the locos storage box appearing on the laptop picture. Lenses used are the Nikon 28-80mm, Nikon 24 -120mm and the Tamron 90mm macro.
After the photos have been taken all images are post processed using Adobe Photoshop 7, this usually involves cropping the image and any minor adjustments to levels colour contrast etc. I find the histogram function available when using the camera shooting software and Adobe Photoshop 7 extremely useful in obtaining the correct exposure.